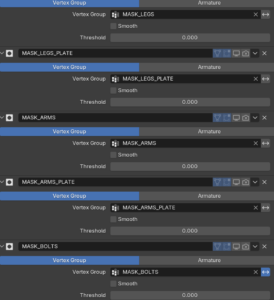
Back again with my rigging process. As already mentioned, the next project is the spider ball. The spider ball is a little robot. It is a ball that can extend its legs, head and guns. Since the model itself is quite complex the teacher provided it divided into different parts as Masks in the Modifier tab. I have never used it before, and it proofed very helpful. With it the different sections of the robot can be easily isolated.
As usual at first every deformation bone needed was created. Then the process of the basic ball rig repeated. Root, Rotation, Body and squash and stretch work pretty much the same.
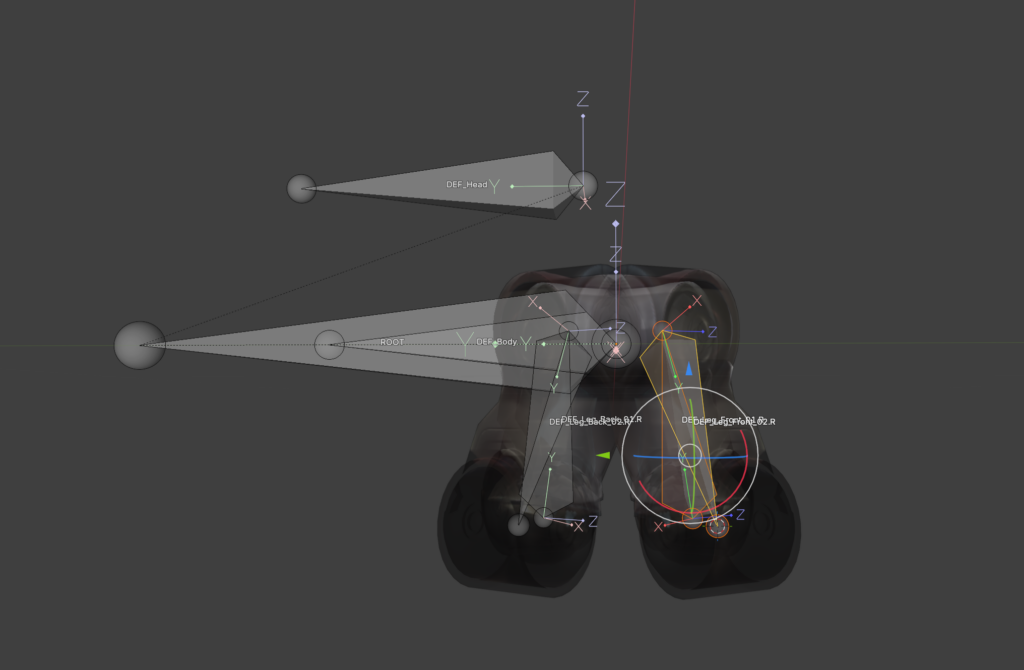
I really appreciated using my 3D cursor to snap bones onto vertices. I can slowly see the appeal of it. I still don’t like it that I use it accidently all the time. I will get used to it.
The skinning was quick; due to the mechanical function there is no need for soft edges. The skinning was done with empty groups. The parts were selected and assigned in the vertex groups. The explanation that every weight is listed on the right side in the transfom window was helpful. In case something is assigned into multiple groups they can be kicked with one klick.
One thing I found myself thinking about again and again is how much I have learned in this rigging course about modelling. There is so much thought about how something will later work in the rig and animation in the model itself. Of course this is also a byproduct of it being a robot. Every function needs to be thought about in the design process. Behind the parts which open needs to be a fleshed-out design and not just an empty hole. I have never modelled a robot myself, but I feel better prepared to do so from now on. It is fun to work with a model that itself doesn’t have mistakes in it and is properly prepared for the rigging process. It makes the work a lot easier.
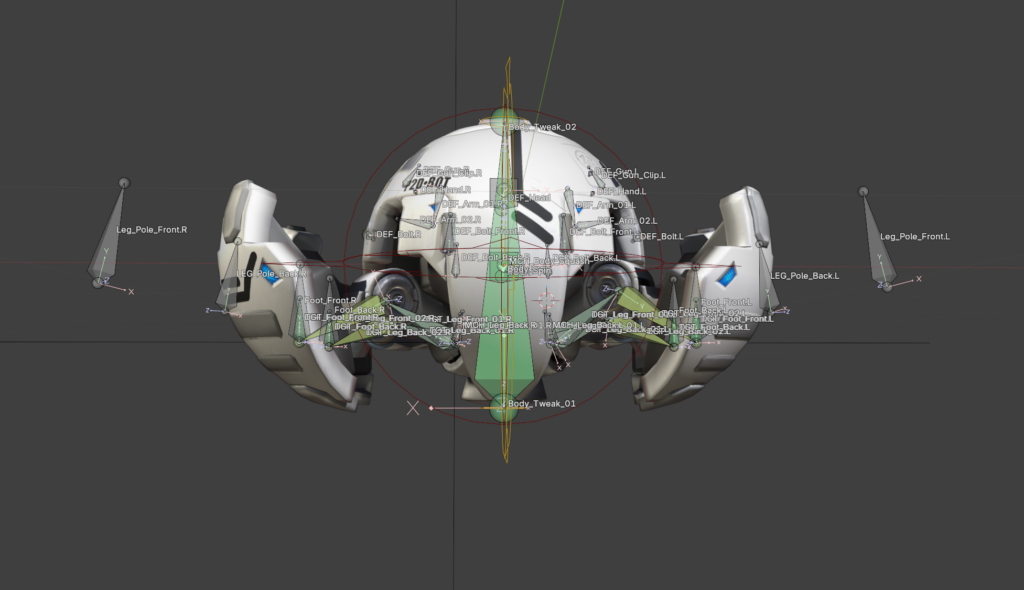
The longest part so far of the tutorial is the IK-leg rig. Number one rule for all bones is that you don’t use the deformation bones in the final rig. Just in case something goes wrong in the process it is easier to go back. Therefore, in the first step the leg bones were duplicated and as usual put into a separate Bone collection. All the deformation bones get the copy transformation constraint, and they follow our copied bones. Then the IK Constraint is used. To keep the leg in the correct angle a Pole bone was added. To get it correct it is important to switch to Normals instead of Global in the Viewport and move the bone via the X Aches. To keep the knee from popping IK-stretch can be used with a very small value. Since a robot is not stretchy a new bone was added at the beginning of the leg bone chain. With a limit distance from this bone to the foot the stretching can be negated. To get the correct length the length of the two leg bones needs to be added together. Just copy them and paste them with a plus in the blender tab console. Tada! Blender has a little calculator too.
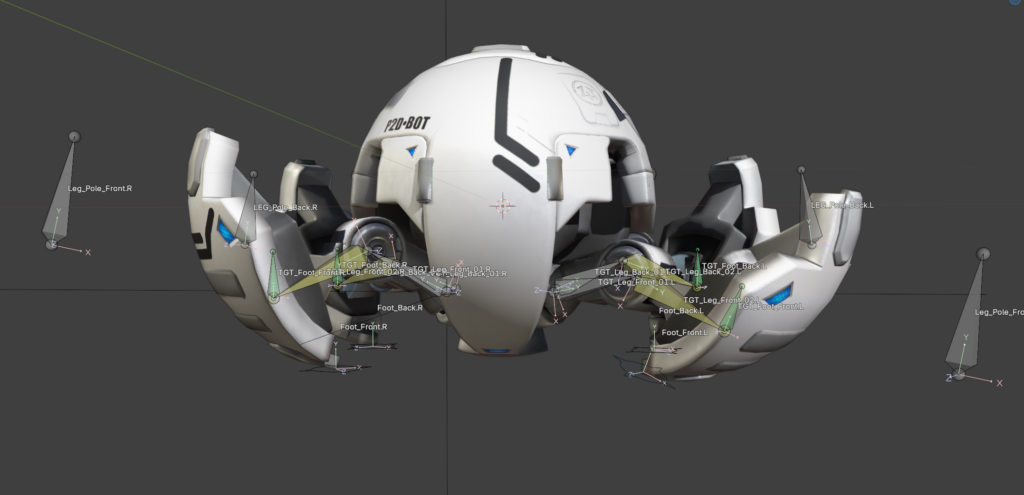
As a last step everything got its custom shape and color. To conclude, I worked through 13 out of 26 lessons. Another 13 and the ball is finished.