I had the chance to join a silkscreen printing workshop and decided that it would be a nice addition to my experiments. I was only able to do one print, since you have to prepare the silkscreen accordingly and I only had the option to use one screen, therefore I really had to think about how I could get the best out of it.
In the beginning, we were told how the process works. On the first day we had to prepare a black and white image or text that we wanted to print and then we had to start prepping the screen. Each one of us were given a screen according to the size of our image. It was already prepared and had a paste on it that was reactive to light. We then placed our images on top and went into the dark room, where we exposed it to light. She mentioned that it needed at least 8 hours, so we had to start the rest of the printing process on the next day.
Therefore, when we came back in the morning, we took our screen and washed it carefully with a pressure washer, so that our motifs became visible, since the paste only stayed in the areas without the image. When we were done with this part everyone got to mix some colours I decided on doing a light green, a red, a yellow and a dark blue, to get some different print options in the end.
Then we were able to start printing, all of us got a ‘Rakel’ (the tool that you use for the printing) and she explained the process once more. First, you put some colour just above your image, but you have to be careful that it is not too much and then you use the Rakel in the right angle and put a certain amount of pressure on it while filling the whole image with colour. Once you are finished, you take the rest of the colour that is left on your screen and put it back into the container. If you want your images to look well-made and clean it is advised to wash the screen after each print or after two prints in a row. This is a little tedious, but the results really showed the difference. I also realized that it will take a bit of time to get the hang of it, since you can easily tell when you’ve used too much colour and when you’ve not washed the screen enough, since the colour that is still on it then dries.
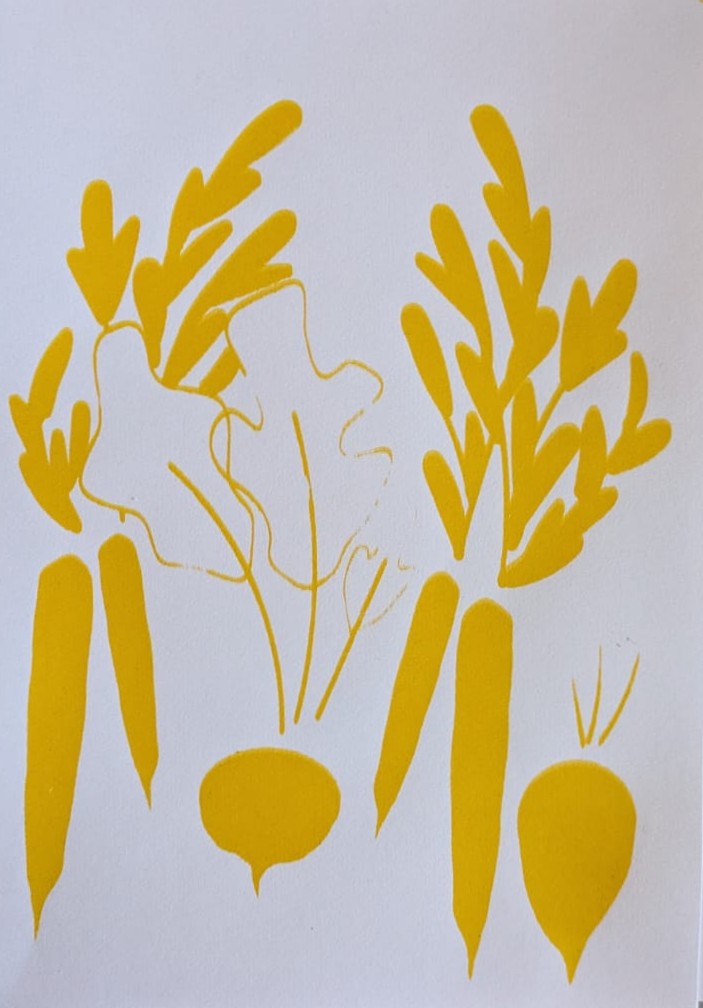
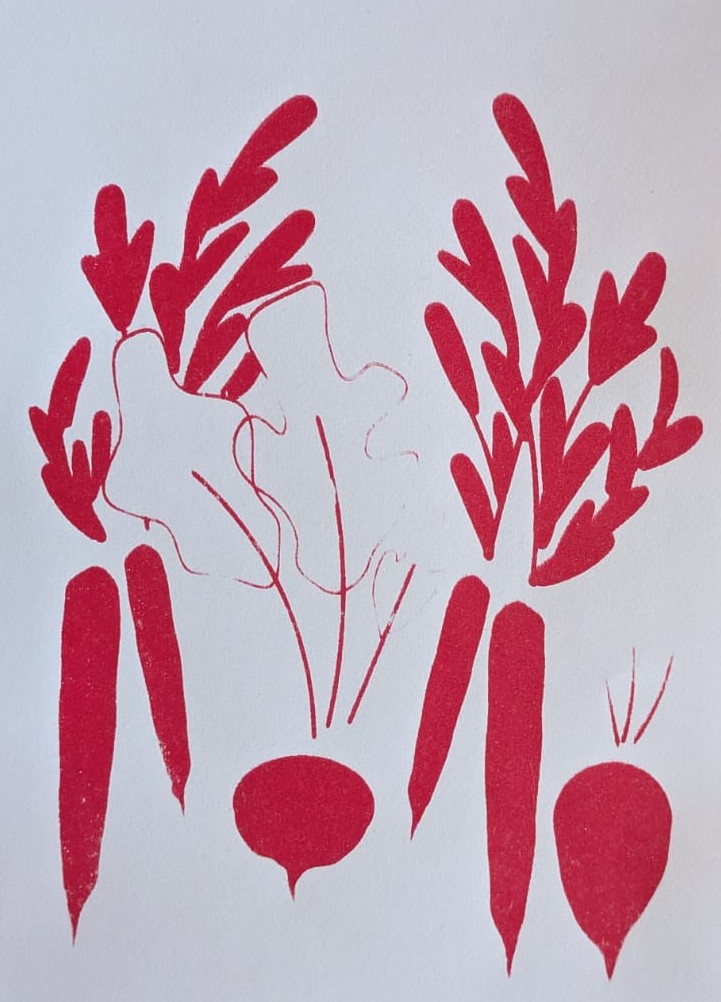
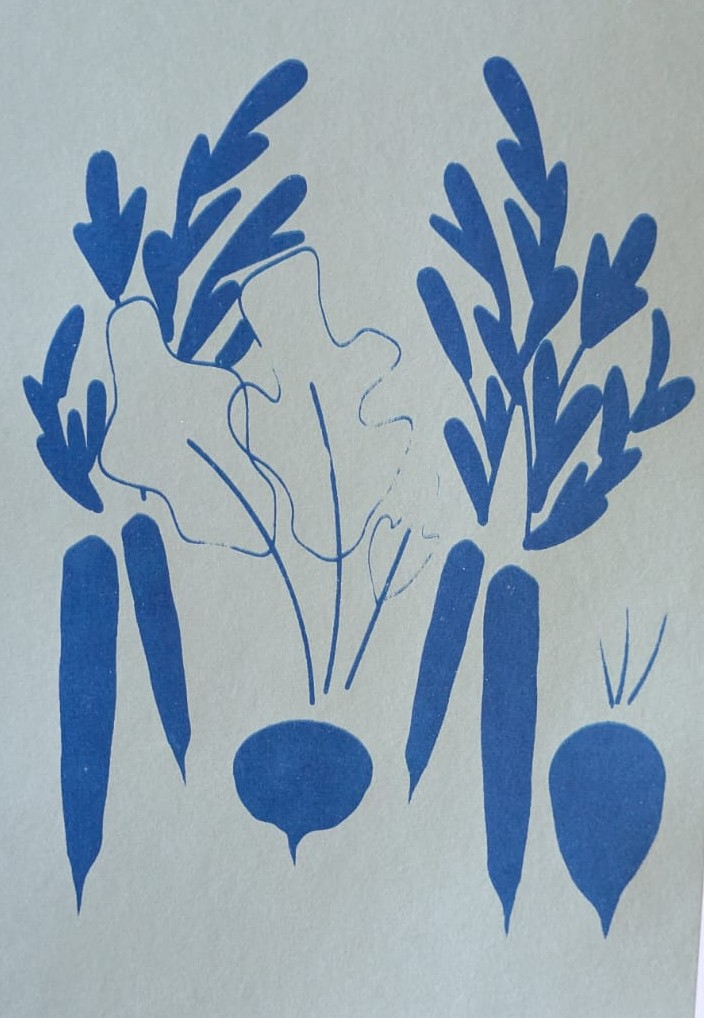
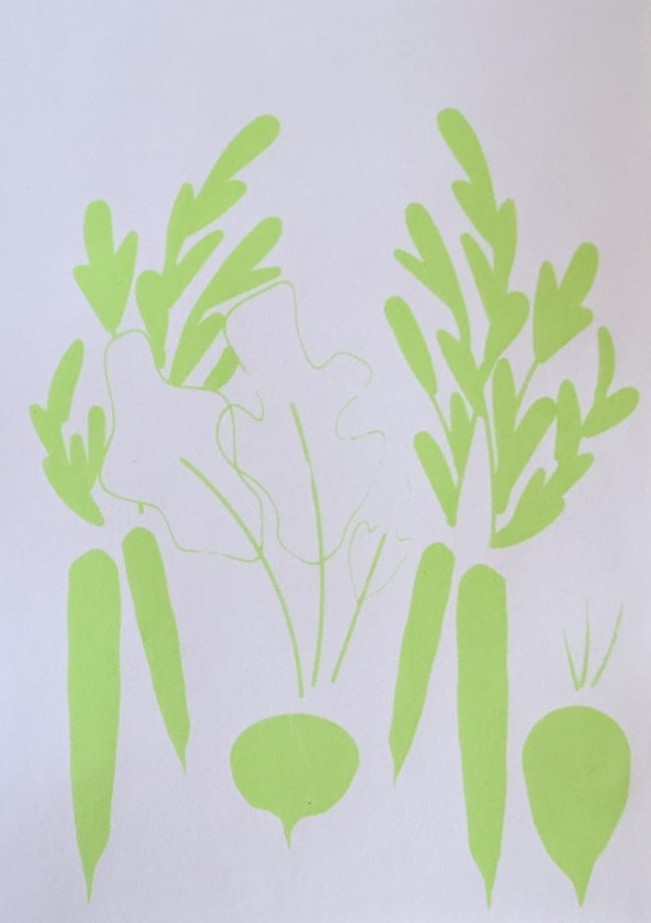
I decided to use make a similar print to what I’ve already tried out with the collage experiment. I made a vegetable print that featured carrots, a beet and a radish (on the topic of “food is political” as I’ve already mentioned in the blogposts before). The dark blue ended up on a mint green paper since the colour came out much nicer in this combination. Below you can see my results. Even though the process was sometimes a bit tedious it was a lot of fun and I also learned that the lines should not be too thin when doing silkscreen printing.