In this blog post I’ll be following the following course:
2.5D means taking the useful features of 3D (like moving in 3D space) and make it look handdrawn.
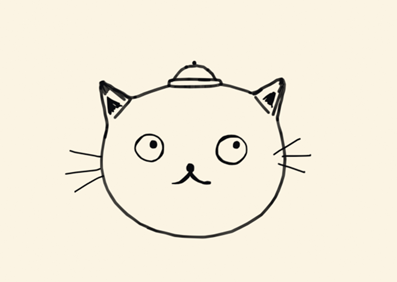
Lesson 1 | Cat Line Art
The first lesson was about creating this simple cat head. The rough workflow was modeling the head and hat with subdivided cubes and add them to a collection “OutlinesGeo”, add blank grease pencil for the outlines, add the lineart modifier to the grease pencil and change the source type to collection (OutlinesGeo). IMPORTANT: For the lineart to show up correctly you have to add a camera and set it up in a way where you always look though it. For some simple animation add the thickness and noise modifier.
To make the background one solid colour, go to the world settings and change the colour, then go to the render settings and change the “View” Settings (under Color Management) from AgX to Standard. For the object to be a solid colour go to the shading tab, delete everything but the “Material Output”, add the “Color” node and connect it into “Surface”.
The face is drawn on a new blank grease pencil. Go into draw mode, change the stroke placement to “Surface” and draw until satisfied. For the whiskers change the mode to “Origin” and go into the front view. To move them to the correct place go to Edit mode and select the whiskers and move them.
HOWEVER: I run into one issue I haven’t been able to resolve. When I try to render this scene, it looks a lot different than it does in the viewport.
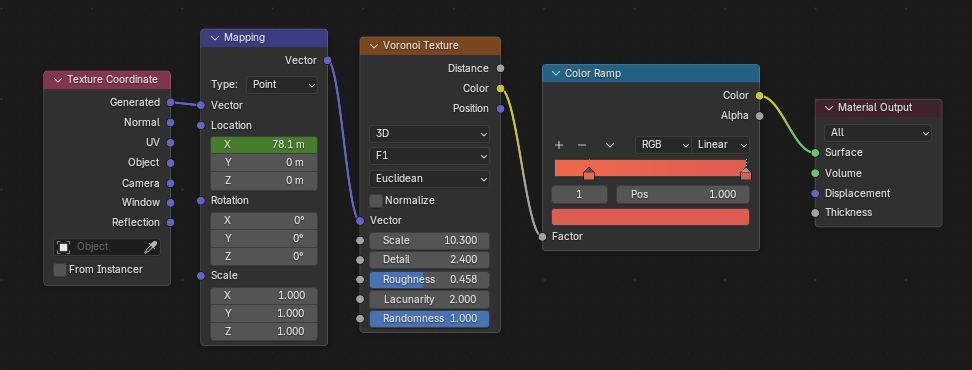
Lesson 2 | Elephant Car
This project works the same as the cat head, just way more detailed. Model the objects, add outlines, model characters, draw details. However this project has colour, thus I created a shader that looks like paint by plugging a Voronoi Texture into a Color ramp, press “Ctrl+T” (activate Node Wrangler Plugin) on the Voronoi Texture, then animate location X in the Mapping.
This is the shader:
Instead of an elephant, I decided to make a cat driving the car…because cats are cuter not going to lie. Certain lines can be marked in the Editor Mode with “Mark as Freestyle Edge” and it’s going to show up like the outlines without having to hand-draw it.
The head was animated by parenting the head to an Empty with the “Track to” modifier. Then I keyed the head in real-time by playing the scene at the same time as I moved the empty while autokeyer was on. This however is still just a screenrecording – I still don’t know how to fix the render.
I’m a bit disappointed that the moneys and baggage is not part of the tutorial.
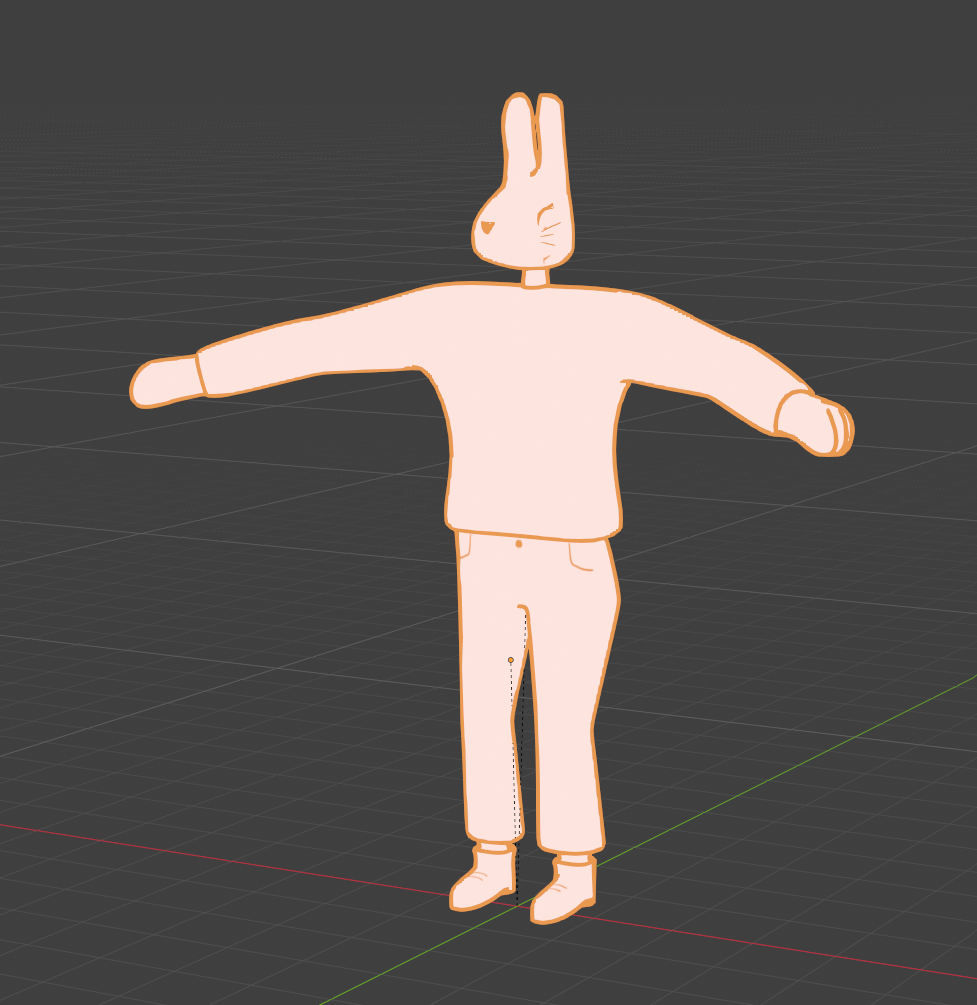
Lesson 3 | Rabbit Musician
The character image isn’t in an A/T-pose, so it’s just used as a rough reference.
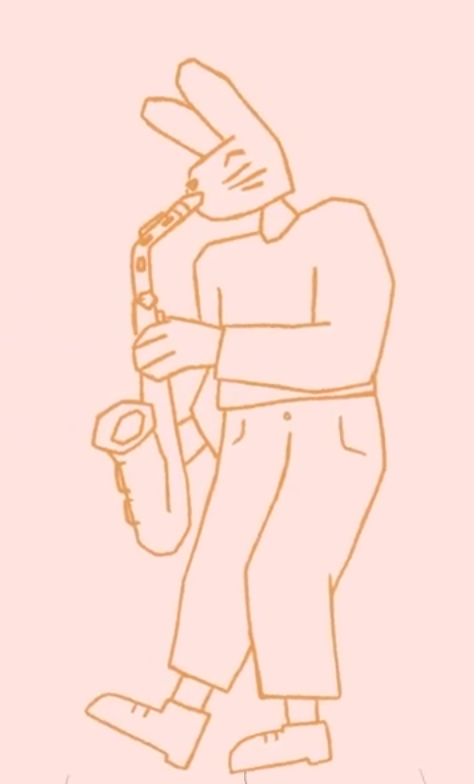
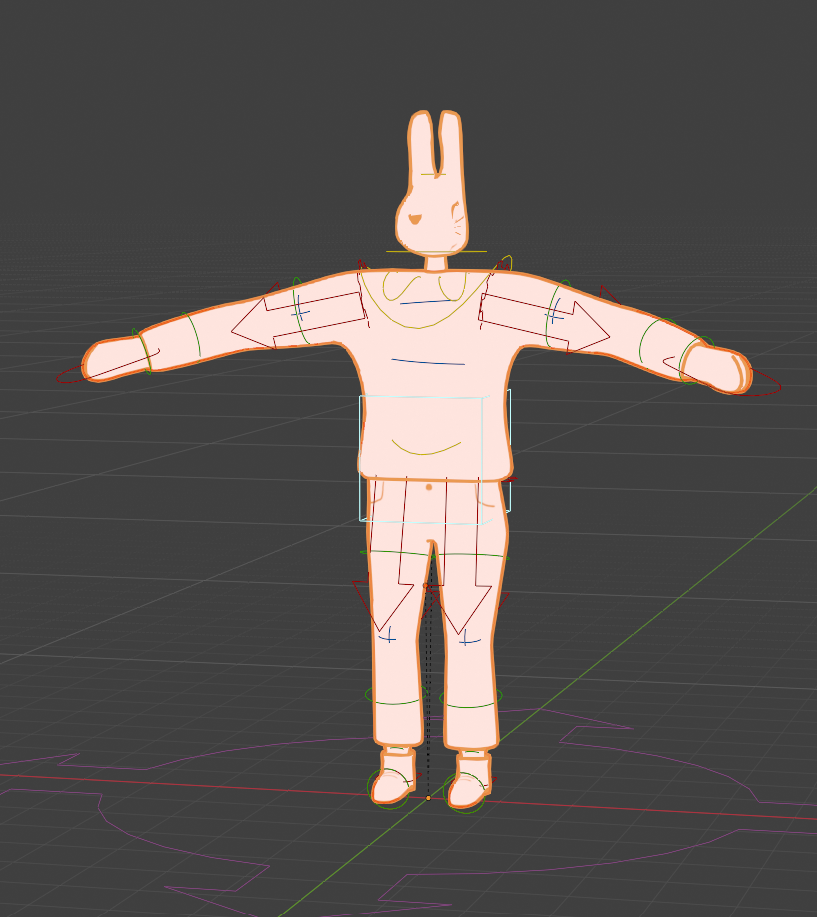
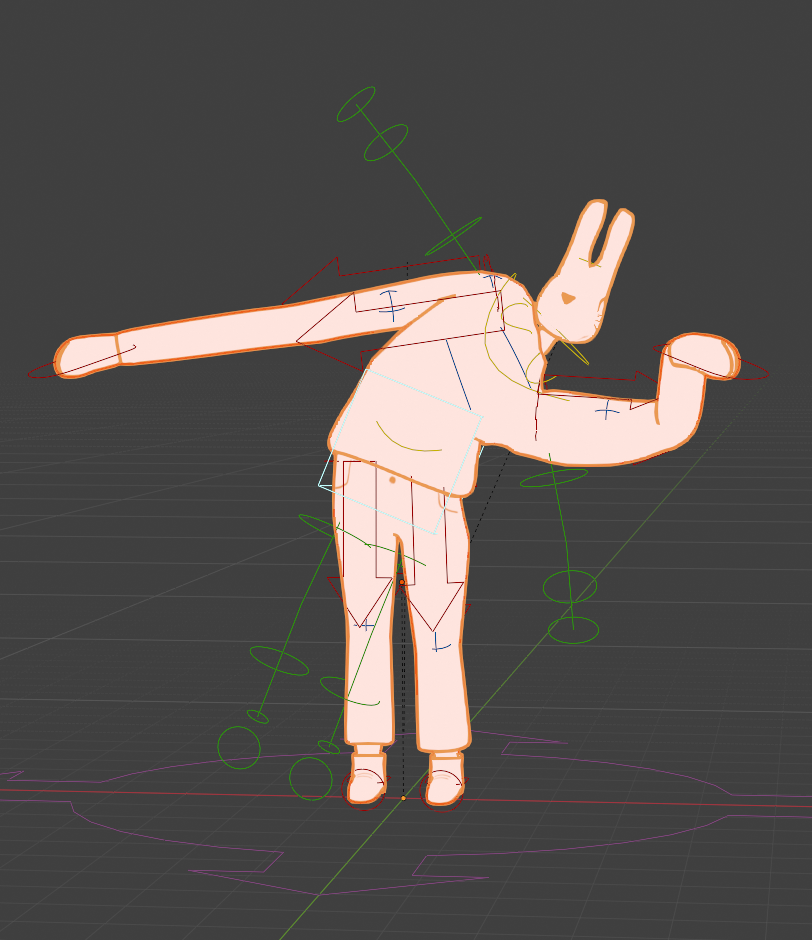
So…I finished this lesson, and the rabbit DOES look good. However at the end I ran into some frustrating problems. The pants are painted in the “Texture Paint” mode, and I did remove the “Mirror” modifier from the body, but it’s still mirroring everything. So I was not able to create the zipper detail. Also there were some paint splotches on the face (which is not connected to the body) and I was not able to remove them for some reason. And then the rig: It worked well at first. I created an Rigify Meta Basic Human Rig, set the bones in the correct place, pressed “Generate Rig”and then parented it by selecting the rig and then the body, using “With Automatic Weights”. The head was added seperately with the face paint bc selecting the head bone, then the face paint and then parenting it with “Bone”. However at some point the rig broke and the hands weren’t working correctly and it frustrated me so much that I stopped. Rigging is not the focus of my project so I will leave Lesson 4 – the Animation be and move on to more relevant things.