Okay, so. First actual Blender session. Let’s talk about how that went.
The short version: not as smoothly as I’d hoped. The longer version is what this post is about.
I started with Patata School’s course on modelling, rigging and animating a character in Blender — specifically the modelling part, which is obviously the foundation everything else is built on. The idea was to follow along, pick up the workflow, and come out the other end with something I was reasonably happy with. And I did, eventually, come out with something I was reasonably happy with. It just took about three times longer than I expected, and my process looked nothing like what was shown on screen.
The Tutorial Speedrun Problem
Here’s the thing about tutorials: the person making them already knows how to do the thing. Which sounds obvious, but the implication of that is that they move fast. Very fast. The Patata School instructor basically speedran the modelling process — doing everything naturally, intuitively, without stopping to second-guess a single vertex placement. Which is great to watch. And completely useless to imitate in real time if you’ve never done this before.
About fifteen minutes in I abandoned the idea of following along step by step and switched strategies entirely. I freestyled it — using the techniques and tips they explained as a loose guide rather than trying to mirror every single move. Honestly? Probably the right call. Trying to pause, rewind, copy exactly, and keep up with commentary at the same time was already turning into a mess. Better to internalize the logic and apply it in my own way than to fall three steps behind and lose the thread completely.
The Actual Workflow (Which Was a Genuine Revelation)
The technique Patata School teaches for character modelling is, in retrospect, so obviously sensible that I’m mildly annoyed I didn’t figure it out myself earlier.
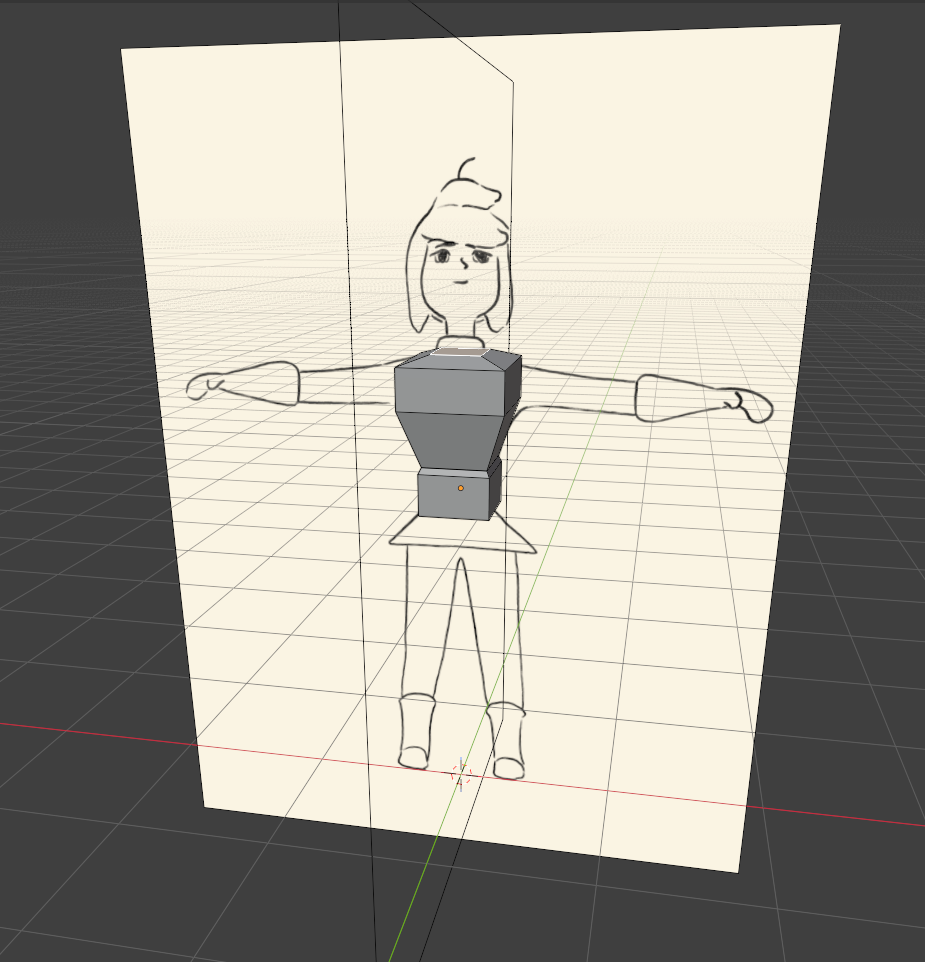
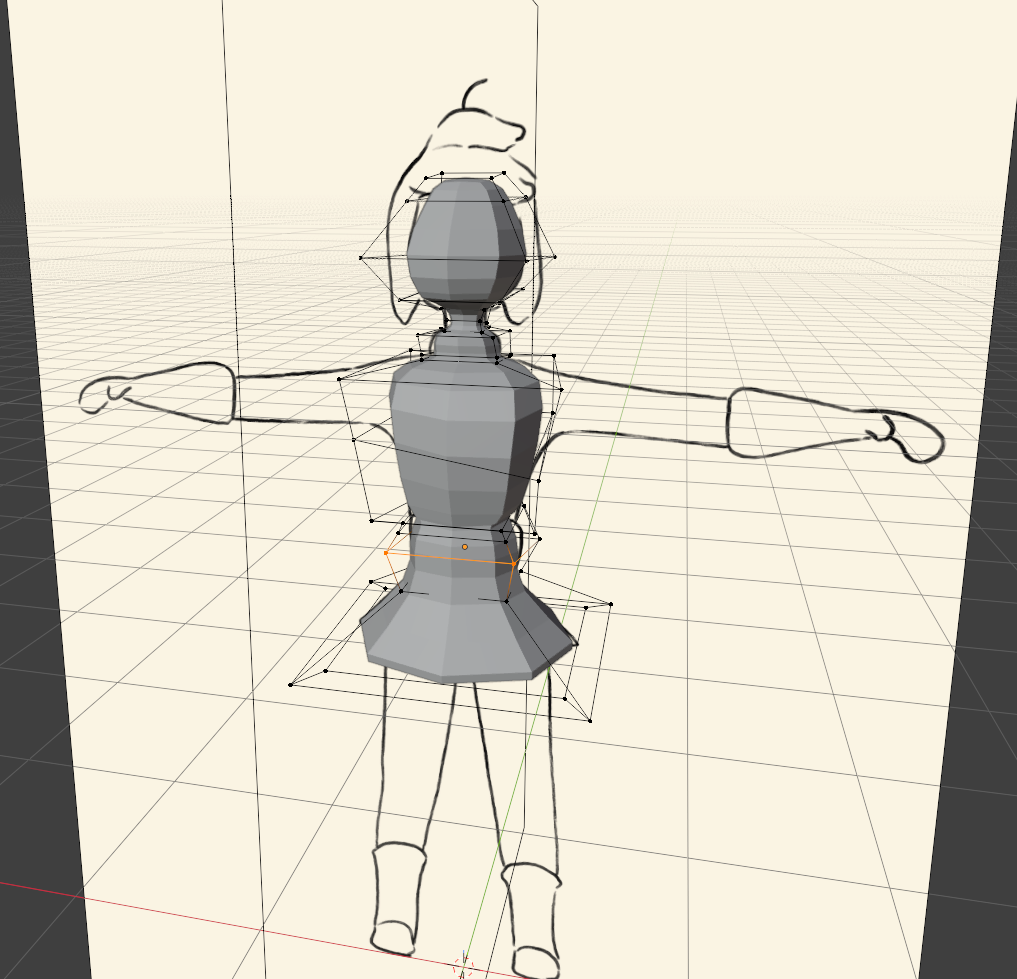
Step one: draw your character. Two views — front and side. Import both into Blender and place them on the X and Y axis as reference images. Then you model on top of them, using the drawings as a guide for proportions and silhouette. No guessing, no constantly rotating the camera to check if something looks right from a different angle. You just follow the drawing.
I once tried to model a character in Blender completely without tutorials, completely without any system, and it was genuinely painful. I had no idea what I was doing with the topology, no sense of the right workflow order, and it took me forever to get anywhere near something that looked like a character. So seeing this approach laid out clearly was a proper eye-opener — even if it sounds simple in description.
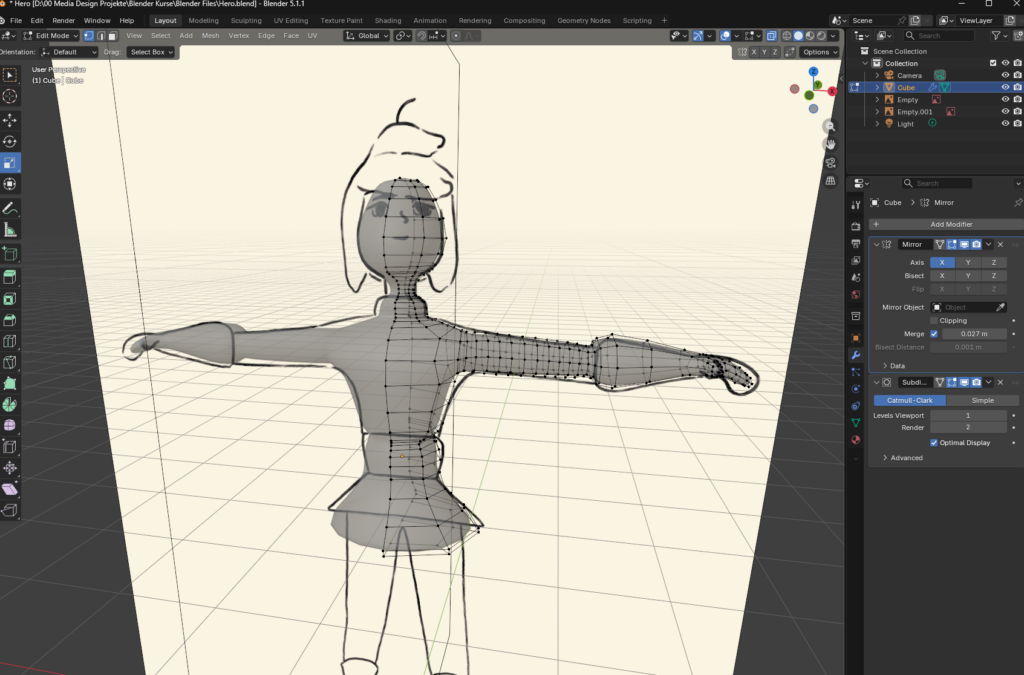
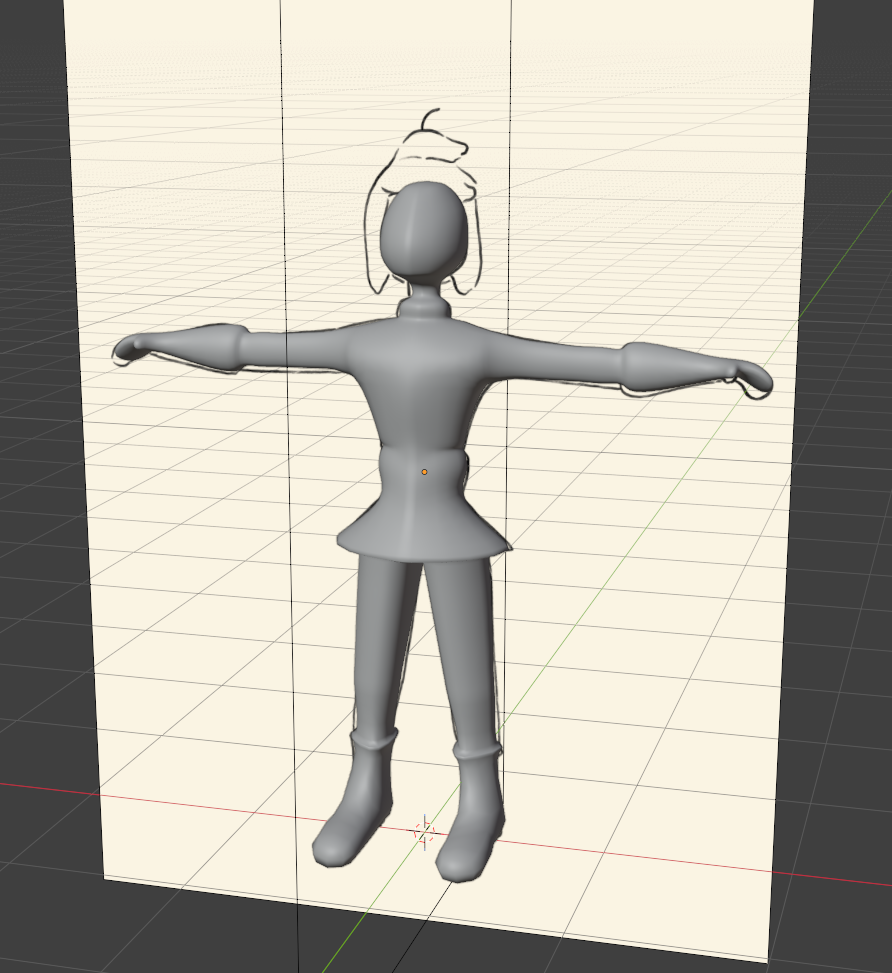
The actual modelling sequence goes: torso and head shape first (no hair at this stage), then one arm. Once one side is done, you delete the other half of the mesh and apply a mirror modifier, which duplicates everything symmetrically. Then you model the remaining leg on the mirrored version and you’re done with the base shape. Clean, logical, and dramatically easier than whatever approach I was taking the first time I tried this.
A few other things worth noting: Patata School strongly emphasized starting with simple, low-poly shapes and only adding a subdivision surface modifier once the foundation is solid. The reasoning is that trying to fix bad geometry after you’ve added a lot of subdivisions is a nightmare — far better to get the base right first and then let the subdivisions smooth everything out. They also use the Auto Smooth Shading option at a later stage to clean up the surface normals, which makes a noticeable difference to how the final mesh looks.
Oh, and a shortcut I didn’t know existed: Ctrl + 2 automatically applies a subdivision modifier at level 2. Genuinely useful, saved me several clicks.
Adjusted Expectations
By the end of the session my expectations for the final outcome had taken a fairly significant hit. Not because the tutorial was bad — it wasn’t, it was good — but because actually following a tutorial, pausing to take notes, rewinding to catch something you missed, and then trying to apply it yourself takes roughly ten times longer than just watching it through. What looks like a forty-minute process in the video is a four-hour afternoon in practice.
Which is fine. That’s how learning works. But I’d be lying if I said my mental image of a polished ten-second character animation with facial rigging and voice acting didn’t get slightly hazier by the end of it.
We’ll see how the next one goes.
See ya!
