Once the interface stopped fighting me, the underlying logic of building materials in Octane turned out to be more familiar than I expected. Most nodes have a direct counterpart on the Cycles side – the equivalent of an Image Texture node in Cycles is called an RGB Image in Octane, and the big all-purpose shader that plays the role of the Principled BSDF is simply called the Basic material. Once I had those name mappings in my head, building out reasonably complex shaders wasn’t much slower than doing the same thing natively in Cycles, since the underlying logic of plugging texture inputs into a base shader is basically identical between the two.
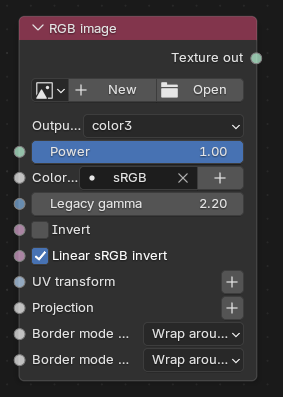
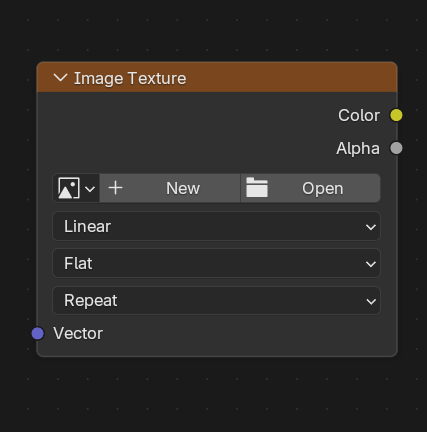
Where things diverge more noticeably is environment setup. Blender has a native environment texture node you can just point at an HDRI and go – one node, one image, done. Octane doesn’t offer that shortcut – you need an RGB Image node feeding into a separate environment shader, which is an extra step but not a difficult one once you know it’s expected. It’s a small thing, but it’s exactly the kind of small thing that costs you ten minutes of confused searching the first time you hit it, before it becomes second nature.
Lights Turned Out to Be the Real Culprit
Lighting is where the two engines diverge the most, and where I lost the most time relearning something I thought I already understood. In Cycles, I almost never touch a light’s shader directly – intensity, size, shape, and color all live conveniently in the light’s properties panel, and that’s usually all I need for a full lighting setup. In Octane, most of those same settings simply aren’t in the properties panel at all. Intensity in particular lives in the shading window, meaning every light adjustment meant leaving the panel I expected to use and going back into the node editor instead – a small context switch that adds up when you’re trying to nudge a dozen different lights into place one at a time.
There’s also a more fundamental difference in how the two engines treat lights visually. In Blender, a point light is invisible to the camera no matter how large you make it – to actually see a light source in a render, you need to build a separate emissive material and apply it to real geometry yourself. Octane doesn’t work that way by default: its lights are represented as actual visible shapes in the scene, not just implied sources of illumination reflected off other surfaces. That’s a genuinely useful default for product visualization, where you often want the light source itself to be visible as part of the composition, but it meant every light in my scene needed to be rebuilt from scratch as an Octane-native light rather than simply carried over from the append.
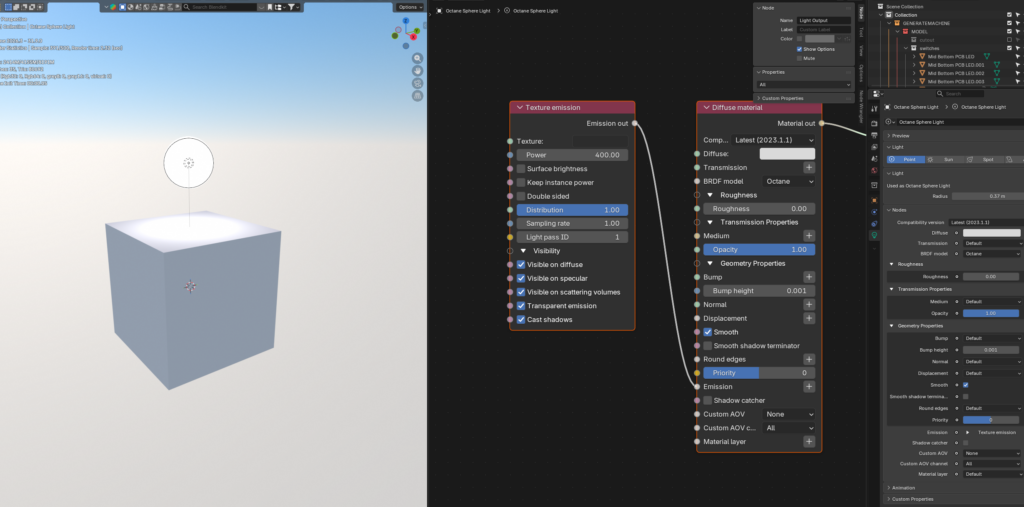
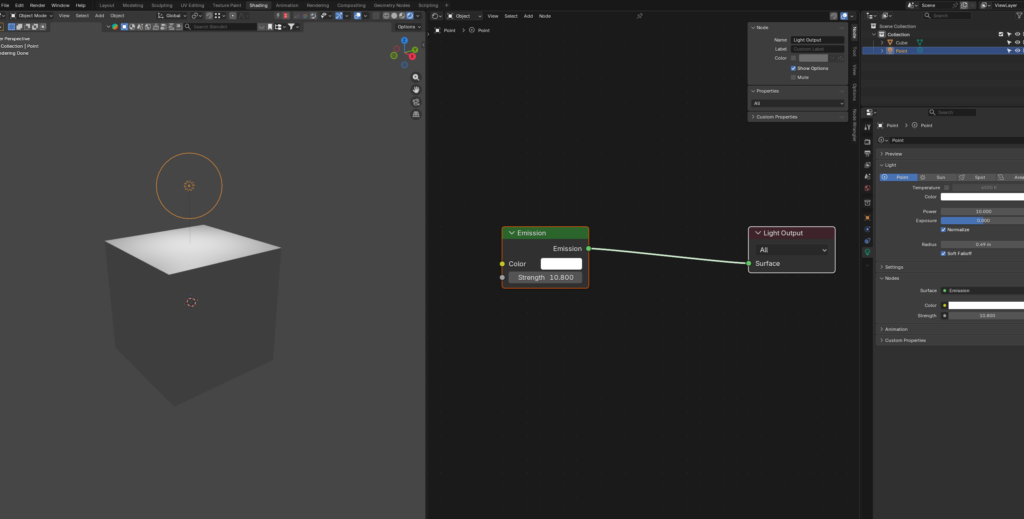
The genuinely confusing part was how intensity and size interact. Making a light physically larger while keeping the same power setting could suddenly make it far brighter, in a way that didn’t track intuitively with what I was used to from Cycles’ units, where increasing a light’s size generally softens shadows without wildly swinging overall brightness. I never fully nailed down the exact relationship between the two values – I mostly adjusted by eye, nudging size and power back and forth until each light roughly matched what I remembered from the original scene. Cameras, by comparison, were a complete non-issue; they carried over from the old file with no adjustment needed at all, which was a small relief after everything the lights had put me through.
One smaller gap worth mentioning: there’s no dedicated “glass” shader shortcut in Octane the way there effectively is in Cycles. To get a convincing glass material, you build it out of a specular shader with the roughness pulled down and transmission dialed up – not a dealbreaker, just a bit of vocabulary I had to relearn.
