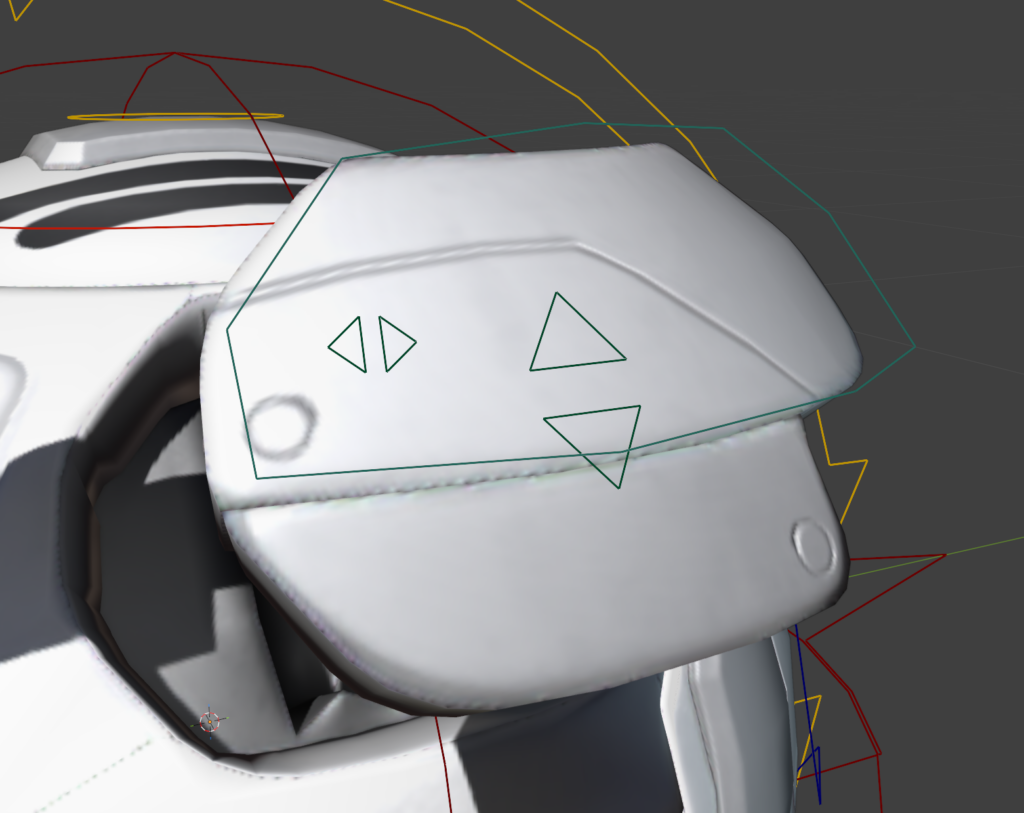
We continue with the arms. Like the legs, they also use an IK-system. It is a lot of repeating steps while rigging. Especially if you have four legs and two arms. For the arms the tutorial didn’t use a pole vector. With the way the arms are placed, there will not be a lot of popping, or it will not be visible. Again, a limit distance was used same as the legs. The only real difference to the legs was the creation of its custom shape. For the shape I created a plane and deleted the face with pressing X (only the face). I assigned the plane as the bones custom shape and aligned the plane in object mode with the placement of the bone. This way I can directly adjust the shape and can see it on the object. With the snap tool on I followed the form of the arm.
As for the gun and magazine both got a Limit Distance Constraint as well as custom shapes. The tutorial used arrows indicating the direction you can use. One rule for rigging is, if you don’t want an aspect to be animated later, lock it. For the gun and magazine everything was locked except one.
Since the arms where a repeat to the legs, the most complicated part this time was the head. The set up itself was easy enough, create a ne bone and put a Damped Track Constraint on it. The head will now follow this bone as if it is looking at it. However, since we want to be able to switch it off, it was time to spend some time on drivers. Drivers use small python operators and functions to create certain rules. For example, if I move a car, its wheels rotate. In this case the rotation is influenced by the x transformation. For our head we will create custom properties which will work like an on and off switch. To get back to the tutorial for the head I listened to a 50 minutes lecture about all of this.
Essentially, we want to be able to switch off the head following the body as well as the aim following the body. With this you can make the little robot roll like BB8 from Star Wars. We create to custom properties for each. To be able to switch between these modes, more mechanical bones with different copy transforms were created. The custom properties drive the influence of each copy transform. Last step again is to create custom shapes for the aim symbol, the head as well as adding a bone with stretch to to get the connecting line between head and aim point. It sounds so easy when I think back, but the execution took quite a while. Especially because somewhere in the tutorial was a mistake and I had to look through the comments to get the same result as he has later. Still, it works great now.
On the legs and the arms, we used a limit distance constraint, which works fine if you never plan on scaling the character. But what if? For that case some adjustments where made. One of the mechanical bones was used as a base. The head of the bone was snapped to the hand bone and then got the stretch to constraint as well as a limit scale. The scale is how far the arm can stretch out. Now the IK-arm bone gets the limit distance removed and gets instead a copy location. The copy location copies the stretched arm bone. In the constraint you can switch between the tail or head of the bone. We need the head for this. The legs have a slightly more complicated process (new bone etc.) but the principle is the same. The ball can now be scaled 😊
One little step is still missing. The Bolts or panels don’t have a rig yet, but since they should only be able to rotate in the y-aches they only got everything locked accept the y-aches. Also, they got custom shapes.
Another little fix for the legs was needed. At the beginning the stretch and squash was created. This causes with extreme poses some issues with the IK-legs and arms. The solution is a driver. We only want the IK active when the transforms are higher than a certain number. With this the stretching is fine again.
For the last step some clean up was needed. For example, the bone groups were split into left legs and right legs etc. Some unused values were also locked.
